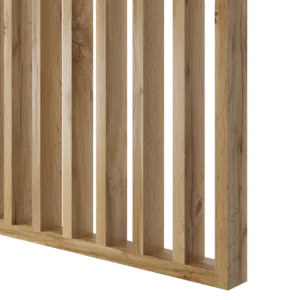
Custom-made laminated partition – complete set
The Lamell partition is a modern way of separating different zones in an interior. It’s simple look adds to the loft feel. Sold in a complete kit, allowing self-assembly. Available in 26 different widths and we can adjust the height to your needs.
Vertical mouldings in a special colour are an elegant solution for stylish spaces. The distinctive surface finish is eye-catching and easy to maintain.
Our prefabricated battens are included (ready for installation without machining), as well as the appropriate dowels, fixings, etc. – everything you need to quickly and easily build an individual partition with slats.
A slatted partition is a modern way of separating interior spaces. It has a lightweight look and the distinctive colours of the slats add loft style to the interior. Sold in a complete kit, allowing self-assembly. Choose the right wall width and colour for your interior.
COMPLEX CONTENTS
- Horizontal strips with holes
- Vertical mouldings with eyelet
- Listings
- Wooden dowels
- Claps
- Installation instructions
Custom-made laminated partition wall – complete set specifications
- Single strip dimensions: 30x70mm (L x S).
- Distance between strips: 50mm
- Profiles are made of durable MDF
- Matt surface
- Square plywood
- Your choice of colour
- Maximum height of the whole wall 275 cm
- Total width: 26 possible sizes, from 51 to 251 cm.
Custom-made laminated partition wall – advantages of a complete set:
- Complete kit – no machining required – all the slats come to you cut to the dimensions you specify in your order, with holes drilled so that spacing is perfect and assembly is extremely easy.
- Easy to install – see the video “How to install?” in the guide.
- Made-to-measure slats – choose the width you want from 26 options (51 to 251 cm) and enter the height in the comments when placing your order. The partition should be 0.5 cm lower than the height of the room.
- Plywood without edge guide
- Modern design
How to install?
- Place all items on the floor.
- Use the fasteners to screw the vertical strips to the horizontal strips. Two longer strips will be installed at a later stage.
- Apply the adhesive to the floor in the space provided.
- Place the wall in the intended position and check verticality.
- Then drill holes for the fixing pegs in the top trim and the ceiling.
- Screw the wall to the ceiling with dowels. (clamps not included)
- Finally, install the side strips with wooden dowels and glue.
Video tutorial on how to install
here.
See also our other trim panels in our online shop.
Ask a recognised company for an installation quote.


